Jump to content
Sign in to follow this  
hsung

How to blend/merge between paints

Recommended Posts

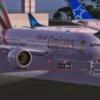
How do you blend or or merge two different colour tones without showing the contrast lines like the image below - see highlighted rectangular.Cheers.


Harry Sung

Share this post


Link to post
Share on other sites
How do you blend or or merge two different colour tones without showing the contrast lines like the image below - see highlighted rectangular.Cheers.
Have a look here.http://effectica.com/threads/5031-TUT-Curv...ient-BackgroundOr just use Google and search for : "fading curved lines photoshop" or "gradient curved lines photoshop"

forumlogopaintmod.png

"Non licet omnibus volare cum aquilis" (Azzurro)

Visit Flybike-Paints

Share this post


Link to post
Share on other sites

Okay, here's a little tutorial on how you do should it in Photoshop (this by the way, is one of the most useful things you could ever learn how to do in Photoshop, and is the way the pros do it).1. Open up any image you like and then duplicate the layer, so that you have two layers both with the same image on.2. With the new (top) layer highlighted, go up to the image menu, and choose 'adjustmensts' and 'desaturate'. That should make your top layer grayscale with your bottom (original) layer still colour. You can use the layer visibility 'eye' icons to check that if you like.3. Next, on the layer's palette, right at the bottom, click on the second icon from the left, which looks like a white circle on a grey square and is called 'Add layer mask'. when you do that, you will see a chain-linked alpha channel appear next to the top layer's thumbnail. click on that chainlinked thumbnail icon to make it active, that will mean you can now paint on that alpha channel, and you will notice that your foreground and background colours in your tool palette are black and white.4. Click on the gradient tool - it may be behind the paint bucket tool, so hit 'shift+G' to reveal it if you cannot see it.5. Now, draw a line right across your image from top to bottom with that gradient tool. what you should see, is the black and white layer blending seamlessly into the colour original layer. This is because the black and white gradient on that alpha mask is altering the transparency of the top layer it is chainlinked to. You can redraw that gradient as many times as you like, to fine tune how the gradiation happens.6. To continue working normally, click on the thumbnail of the image and you will see a bounding box appear around that (instead of around the chainlinked layer mask), which indicated you are now off the alpha channel and back on the normal layer.This technique should enable you to understand how it is possible to blend anything in Photoshop into anything that is on a lower layer, by using transparency, so having learned how it works, you can apply that to how you do your repaints.Hope that helps.Al


Alan Bradbury

Check out my youtube flight sim videos: Here

Share this post


Link to post
Share on other sites

Thanks Al for your step-by-step instructions on how to use the gradient tool in Photoshop :( I am using Paint.NET which also has a gradient tool, except I don't have to duplicate a new layer or change it to grayscale.On a different note, is it possible to replicate the original aircraft's patterns when using the Paint Bucket? When I use the Paintbucket to replace the colour of an original section, it puts a flat colour and does not maintain the original patterns on the fuselage.


Harry Sung

Share this post


Link to post
Share on other sites

In Photoshop, what you want to use to change the colour, but maintain the pattern, is one of two methods: One way is to use the replace colour menu option, which opens up a little palette where you select the tolerance of what you want to change the colour of by using some eye dropper tools and a tolerance slider, and then having done that, pick a new colour by either using the slider controls, or clicking on the 'result' thumbnail to pick a specific colour.The other method, if you have a fairly recent version of Photoshop (i.e. CS2 onwards), is to use the colour replacement brush tool, which is hidden below the normal brush tool (you can get to it by hitting shift+B, or clicking and holding the mouse down over the normal brush tool in the palette), the colour replacement brush tool will let you paint any colour you like, but will retain any shading or patterns that are on the image, since it only changes the colour values and not the tonal ranges. There is a crosshair in the middle of the brush which indicates the tolerance switch point, so if you keep that crosshair off what you don't want to paint, it will be easy to use.Worth knowing too is that the left and right square bracket keys will let you change the brush sizes in Photoshop on the fly.Since Paint.net is basically a freebie clone of PS, I should imagine there is something similar in that.Al


Alan Bradbury

Check out my youtube flight sim videos: Here

Share this post


Link to post
Share on other sites

Create an account or sign in to comment

You need to be a member in order to leave a comment

Create an account

Sign up for a new account in our community. It's easy!

Register a new account

Sign in

Already have an account? Sign in here.

Sign In Now
Sign in to follow this  

  • Tom Allensworth,
    Founder of AVSIM Online


  • Flight Simulation's Premier Resource!

    AVSIM is a free service to the flight simulation community. AVSIM is staffed completely by volunteers and all funds donated to AVSIM go directly back to supporting the community. Your donation here helps to pay our bandwidth costs, emergency funding, and other general costs that crop up from time to time. Thank you for your support!

    Click here for more information and to see all donations year to date.
×
×
  • Create New...