


Carenado Seneca V
A review by Ray Marshall
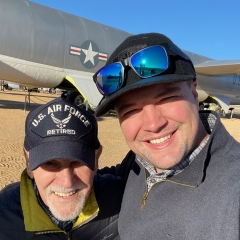
Lined up at Siletz Bay State Runway 35 on the coast of Oregon, I put the power to the twin TSIO-360s and watched the airspeed tape come alive. The new Seneca looks for positive backpressure to unstick at 65 knots, and the nose comes up smartly. There's no requirement for flaps on takeoff as on the earlier Seneca IV. Rotation speed is 81 knots at Gross Weight and Obstacle Clearance is the same, let’s call it 80 Kts for convenience and relax a little pressure for the best climb profile.
Aiming for an initial 88 knots blue line speed, I retract the gear once a positive rate is established and accelerate towards cruise climb of 110 knots. I am now well above the trees at the end of the runway of this typical small airport. Looking around for traffic I see the golfers are out for another round this morning and many are pointing up and looking at this beautiful new bird.
You will notice that Piper does not waste any paint when adding the Red and Blue lines to the airspeed indicator. This is a dead giveaway that you are not flying a Cessna or Beech.
Bill Womack sure did a great job on this hide-a-way airport in the Orbx Pacific Northwest area. Maybe we will checkout the new Northern California scenery area for our Seneca V cross county flight.

I head out West over the coastline for some introductory air work in this newest Seneca. Funny, the panel looks up to date with these small glass panels, but it sure looks like a Seneca IV to me, which looks like a spitting image of the Seneca III, which was a true descendant of the Seneca II and I. I think the most popular one of the series was the Seneca II that came along in 1975.
By new, I mean new from Carenado, not new from the Piper Company. From the outside this one looks exactly like the million dollar job being delivered in Vero Beach, Florida this morning, but the Carenado edition is based on a 2004 model based in Chile. All specs are pretty much the same as the 2014 model with the exception of the panel arrangement. This one has the Garmin G600 dual glass panels with a couple of GNS430s and the STEC 55x autopilot as compared to a 2014 model with the 3 large panel G1000 Garmin displays.
The in business/out of business/bankrupt/back in business/new company name/out of business/sold to the highest bidder/back open for business with a bright future company is again operating today as Piper in Vero Beach, Florida. As one of the original Big 3 U.S. general aircraft manufacturing companies, Cessna and Beech being the other two, the only thing that remains the same as when our 2004 model Seneca V was built is the name and logo.
Both Beech (Hawker/Beechcraft) and Cessna are owned by Textron which is an American company. The Bank of Brunei owns Piper. The only other general aviation company building airplanes in the U.S. is Cirrus and the Chinese owns them. Welcome to the new world order. Piper had an alignment with a Boeing company for worldwide parts distribution for the existing fleet of Pipers but I have no idea if that remains in force. Most of the 2014 news releases have to do with Piper doing business in China. Of course, that may be just as true at Cessna, Beech, and Cirrus today.
Not that any of this corporate wheeling and dealing has anything to do with flight simulation and our 10-year-old replica. The only bad news in the whole deal is it looks like the PA-47 Piperjet Altaire may have bit the dust.
The Seneca II Got It All Moving Forward
It was the Seneca II that enlarged and balanced the ailerons, added that rudder anti-servo tab, and the stabilator bobweight that all still exists today. In addition to fixing the complaints about handling qualities, Piper turned the two middle seats around to face backwards so the guys and girls could talk to each other and act like they were in a big corporate airplane going to a business meeting. The advantage was the guys could play footsies under the little table with the girls and the cabin felt larger.
|
|
|


Of course they all look like the old Cherokee Six with a pointy nose with an extra engine. A quick look over my shoulder confirms the big barn door is still on the left side. But, it is still wider than almost every other light twin out there and seats six if you stop adding gas at about the half full mark.
On the positive side, it had no trouble whatsoever getting out of this little airport with the tall trees just past the numbers and it has intercooled and turbocharged engines so it should be able to get over most of the weather provided I choose to wear an oxygen mask. I read the Seneca V is the highest performer in single-engine climb speed and altitude when compared to its peers.
This plush leather interior does have that modern airplane look and it sure is roomy and comfortable with good visibility. I do love flying these small piston twins. The hydraulic landing gear free-falls if pressure is lost so there are no provisions to crank the gear down.

Engine-outs in Senecas have always been easy to handle, thanks to counter-rotating props. The turbocharged Continental TSIO-360 engines have proven reliable especially thanks to the intercoolers and automatic waste gates. Earlier models had mechanical waste gates that invited aggressive pilots to over boost the engines. Now you just throttle up to the manifold pressure you want, and the automatic waste gates hold that value as you climb to your cruise altitude.
A Short Side Trip to Explain Turbocharging and Intercooling
Because our new Carenado Seneca V has both turbocharged and intercooled engines, maybe I should explain these terms for our normally aspirated friends that may be stepping up to their first turbo.
I assume because you are a pilot that you understand the air gets thinner the higher you fly and that at about 12,000' you need supplemental oxygen or you will suffer from hypoxia, crash, and die. The authorities have defined a standard day as baro pressure of 29.92 inches of mercury, 14.7 lbs/ ft2 of air density at 15 deg C. at sea level.
Because airplanes are made to go up in the air you can bet the 220 hp engines on your Seneca wings will only produce 220 hp at sea level in Standard Day conditions. As you fly higher, the air has less pressure and lower temperatures. We use the term density altitude for a reference. So if your engines are getting less air and at a different temperature than standard, the horsepower will be lessened.
The turbocharger was invented to solve this problem to some degree. These are small turbines in a circular case connected by shaft to an impeller wheel. Your engines exhaust is fed directly into the turbocharger where the spinning turbine converts it into rotating energy that spins the impeller wheel and compresses the exhaust air. This compressed air is fed into the engine’s combustion chamber allowing it to burn more fuel and create more energy to power the aircraft. Thus, we have full-rated power despite flying higher than seal level.
At a given altitude, called the Critical Altitude, this forced induction will no longer maintain full rated output as compared to sea level. We can continue to climb to higher altitudes, but we will not have the full rated engine power. The critical altitude for the Seneca V’s Continental engines is 19,000 feet, but we can fly as high as FL250.
The Intercooler is a recent addition to the Seneca engines and is used to reduce the heat the turbocharger produces and to help with more efficient combustion. This cooler air being fed to the combustion chambers is the basis for the term - intercooled - engines.
You may also come across the term turbo-normalized when referring to a specific turbocharging system. This refers to aircraft turbos that work to achieve sea level horsepower performance at higher altitudes.
One last new term is the automatic waste gates used in the Piper Seneca V turbos. These are limiting valves built into the system to protect the engine from overboosting or trying to produce excessive horsepower when we use full throttle at sea level. The Seneca V has a fully automatic system so we don’t have to worry about damaging our engines when firewalling the throttles at takeoff.
There are many benefits of having turbo-normalized intercooled engines with automatic waste gates like we have installed on our Seneca V in addition to higher engine performance at higher altitudes.
The more obvious advantage is that we can fly higher to get over weather or mountains and fly faster at these higher altitudes. The side benefits may include avoiding an icing layer or turbulent altitude or being able to avoid headwinds or take advantage of tailwinds. Fuel flow is less due to the engine running at higher efficiency, thereby saving a little money and extending the engines life.
The bottom line is we can fly higher over most weather, throttle back, and fly faster on less fuel. Why aren't all planes turbocharged?
Flying any turbocharged airplane in a flight simulator is a no-brainer. We don’t need oxygen but we can benefit from all of the above, plus we can use the extra horsepower at lower altitudes to climb out at high altitude airports like Jackson Hole, Denver, Telluride, etc.
I read that the automatic waste gates will also maintain any given manifold pressure setting for cruise or descents. I wonder if that is coded into our flight simulator version. We can check this out on one of our test flights.
Who Buys a new Seneca V?
Of course, you have to really want a Seneca V to put out a million dollars for a new one. The target customer is someone with money that already likes the Piper line. The typical Seneca V buyer has owned a new Piper Saratoga II for two to three years, although some are Archer owners looking to build multiengine time. For this reason, many Piper Dealers schedule demonstration flights in a Seneca V soon after the known Archer and Saratoga owners pass the two-year mark.
Potential buyers may also be someone with an older Saratoga, Seminole, or Arrow or the owner of an earlier model Seneca. A surprising candidate for purchasing a new Seneca V is someone actually having the money and would like to buy Piper's turboprop single, the Meridian, but can't meet insurance prerequisites for flying a turbine-powered airplane as pilot in command. A couple of years of flying your own Seneca V should help bring the insurance pre-requisites back in line with reality when stepping up to the Meridian at a cool 2 million dollars, or maybe the pressurized Mirage for half that price.
A Little History of the Seneca V
The Seneca V fuselage is a highly upgraded version of the fixed gear PA–32 that debuted with the Cherokee Six in the mid-1960s. Now, however, the four club seats in the back and the cockpit seats are stitched in soft leather compliments of the Piper Saratoga II HP total makeover back in 1993. That smart looking, efficient and thoroughly modern panel also came from the same Saratoga upgrade team that performed their magic in seeing how much the Malibu Mirage panel and interior could influence some of the smaller Pipers. Extra soundproofing quiets the ride and optional air conditioning cools the cabin. The nose baggage compartment can swallow up to 100 pounds of gear, as can the separate baggage compartment behind the aft seats.
The new aluminum panel has an updated and professional look to it, let there be no doubt. The vertical stack of dual Horizon Aerospace engine gauges is a big part of that look, and so is the Checkpoint Digital Display Monitoring Panel (DDMP). The DDMP is at the top of the engine instrument stacks, and has a rotary mode selection knob that lets you display a wide range of system and performance data. These include engine power output, fuel and electrical system status, temperatures, and any excessive values — such as engine overtemps — along with the duration, peak value, and time of day and date of the anomaly.
The DDMP can be set up to show just about any combination of parameters. Especially helpful is the percent-power display. This lets you adjust the engine controls and watch the percent-power display change until it shows the power output you want.

As vital as this DDMP instrument is for conveying practically everything as a digital readout from all these neat new gauges you would think there would be some sort of pdf file for operation and capabilities and such. But Nooooo, not one ounce of information is to be found anyplace. This instrument alone could replace most of the missing climb and cruise charts once you are in the air and flying. Of course, we still need them for flight planning purposes.
Setting power is no sweat, thanks to the V's automatic waste gates. You simply throttle up to the manifold pressure you want, and the waste gates hold that value as you climb to the critical altitude — the altitude where the waste gates are closed and power output begins to drop off, approximately 19,000 feet according to New Piper. Even so, the V's Rajay turbochargers let you cruise as high as 25,000 feet — but up there you'll need the built-in oxygen system option.
It might be interesting to have one of these newest Senaca V’s with the large 3 panel G1000 Gamin packages but Carenado’s G1000 is just not ready for prime time. I really think we are better off as flight simmers with this chosen edition – the Garmin 600 dual units with enough round gauges and the new engine-monitoring feature to make most everyone happy.
According to Piper CEO Simon Caldecott, the motivation to transition to the G1000 in the Seneca V was market driven. Customers wanted it and the company saw it as an opportunity to take potential market share from the Beechcraft Baron G58. Caldecott says the Seneca V with its lower price and better fuel efficiency should attract potential customers, which has traditionally led the piston twin market outside the training arena, where the Piper Seminole is the top seller. Base price for a Seneca V is about $972,000, some $300,000 less than that of a similarly equipped Baron.
Piper claims a maximum speed of 204 KTAS at of FL250 feet. A Seneca review published in AOPA Magazine in March, 2013 stated the Seneca V with the G600 panel flying at 7,500 feet returned 177 KTAS with intermediate cruise settings. Using a turbine inlet temperature of 1,560 degrees F, 30 inches of manifold pressure, and 2,500 rpm the engines were burning about 12.4 gallons per hour per side. An economy cruise of 27 inches and 2,300 rpm produced 159 KTAS, with the reduced fuel burn of 10.1 gph per engine.
|
|
|
|
| |


Even those flight simmers that are reluctant to move up to the inevitable glass cockpits should warm up to this nice mix of dual G600 panels with a good balance of standard round gauges or as they are often called steam gauges. These are nice bright 3D gauges with user-controlled reflections.
It seems to me that you either like Piper products or not, and if not your only real choice for a small twin is the Beech Baron or the Diamond DA42 if you want to buy a new one. When Cessna shut down its piston-engine production lines due to the stupid lawsuit craze of the mid 1980s it never restarted the piston twin-engine line again opting to concentrate on the Citations jets as their only twins of choice.
If you are in the market for a piston twin, but not a Piper twin, I recommend you take a look at the Beech Baron or Cessna Skymaster. Both are available at Carenado for FSX and P3D, but you will be missing out on the Garmin G600 glass panel and club seating in the Seneca V.
Three short videos for sights and sounds of the Seneca V
This is a new model with the G1000 avionics – not the G600 like the 2004 Carenado model.
HD quality virtual cockpit, exterior, and sounds for the Carenado Seneca V flying in P3Dv2.3 by gpestel.
Touch and go - Strictly for the sounds from inside the airplane.
Back to Flying the new Carenado Seneca V
We are now level at 5,500 feet a few miles out over the blue Pacific waters and time for what I call ‘get the feel’ of the airplane. I like to ease into slow flight by simply bringing the power back to idle and holding my altitude with backpressure on the yoke until I get to a comfortable airspeed. This is usually 1.3 x VSO (calibrated airspeed) and varies with the gross weight of the plane so let’s use 88 knots for this one. Then bring in just enough power to hold airspeed and altitude.
This looks like a good time to jump in with the specs and performance of the Seneca V.


You will notice there is nothing outstanding or maybe I should say nothing that stands out from the expected in these numbers. Well, maybe the single engine service ceiling is quite high, and the takeoff and landing distance is a little on the short side for a 6-place twin but the cruise speed would be great if you could actually achieve 200Kts on a given flight or given day.
One of the advantages of flying different but similar planes over a lifetime is that you can form your own opinions - right or wrong. One of mine is that Cessna usually publishes performance numbers that are achievable and can often be exceeded. Piper sometimes publishes cruise speed numbers that are suspect and can seldom be exceeded. Beech on the other hand always says “come on out and test fly our latest model and see for yourself how she performs, we have great prices and everything is on sale.”
Piper claims a high-speed cruise of 204 KTAS at the Seneca’s 25000-foot ceiling, which may be true, but I see cruise speeds at lower altitudes on the typical day of around 175 knots. There is plenty of difference there. Getting to FL250 in a fully loaded small twin is no trivial matter, unless it is something on the lines of the Learjet twin.
We will check the cruise speeds and fuel consumption numbers for ourselves while on a cross-country flight down to Monterrey, California later in the review. I have the urge to play another round of golf at Pebble Beach and this will also serve as an excuse to check out the new KMRY scenery in P3Dv2.
The Real Deal with the G600 Panel
Here are some photos you can use to check the accuracy of the Carenado workshop. It all looks pretty close to me.
|
|
|
|
|
|
|
| |


This is also an appropriate time to compare the panels of the older generation Seneca, our middle of the pack new G600 edition, and the most up to date 3-screen G1000. Remember we have one on top.

This serves as a transition from steam gauges or more accurately round gauges to the full glass panels. With the new 2014 model being "all glass" and the earlier models being "no glass," we should have the best of both worlds.
The Carenado Seneca V offers a little of each or both. The view from the pilot’s seat is pretty much the same view as the right seat, except the left seat has the required 3 backup standard gauges just to the left of the G600 dual panel display. The backup altimeter is partially hidden by the individually removable yokes. Your backup glide slope head is below the G600 panel and to the right of the BU altimeter. Here is a view showing the backup round gauges with the pilots yoke removed.
|
|
|


Just looking at the full Seneca V panel with the dual G600 Garmin panels it appears not to be crowded. This may be a partial result of being wider than most planes this size. The chosen spot for the ADF and Transponder is a little weird. I sure wish we could move it up about 3 or 4 inches so it would be visible on the monitor when flying the flight simulator.

When I'm unable to find a switch, I have to keep telling myself to look up for the wide array of switches. Duh. However, after flying the Seneca V for a few days in a row, I think I like the Master and Mag switches up where I can actually see them—rather than down at my knees under the yoke. I think this example is one of the reasons the panel doesn’t look crowded.

Notice the safety guards on some of the switches and some are ganged together for convenience. I usually spend some time studying the color-coding on the ASI when I haven’t flown a particular airplane in a while. Nothing is more important than the Red and Blue line other than what they actually represent. The second most important thing is the white arc, especially the low speed end.

The Red Radial Line, the One Engine Inoperative Air Minimum Control Speed is 66 knots—which is a very low speed for a twin. The Blue Radial Line is the One Engine Out Best Rate of Climb Speed—which is 88 knots. What we can confirm is this is a really slow flying airplane. I forgot to mention earlier that the props on the Seneca are counter-rotating. This design effectively eliminates the critical engine.
Your memory items are the speeds that are not shown or indicated on the ASI. These are the normal climb speeds, VX and VY for the Best Angle (76 Kts) and Best Rate (92 Kts)—which are the single engine equivalents for VXse (78 Kts) and VYse (92 Kts). Maneuvering Speed, or VA, is 140 Kts. The Gear Extend Speed is 130 Kts and the Retract Speed is 108 Kts. Finally, VSO is 61 Kts and VS1 is 67 Kts.
Many of the speeds have indicators on the G600 Speed Tape. Buried deep inside the setup pages are means to add or change some of these indicators.
The best rate of climb speed should result in 1,460 FPM climb at full gross weight. With a light load you should be able to bump that up to 1,800 FPM or so. I have found that when you are just out flying around getting familiar with this new Seneca V, that some weight in the back baggage area will balance the plane just fine. I use the full 100 lb baggage limit when flying alone or when only the front two seats are occupied.
Because we are primarily concerned with operating the Carenado Seneca V in one of our flight simulators, I tend to look at the maximum, high speed cruise curves, or speed tables and am not concerned about fuel consumption—other than the effects on my particular flight plan. In other words, I am going to push this one hard to bring the speeds more toward that magic 200 Kts marker.
Do notice the Carenado supplied performance charts are woefully lacking. One simplified table for power settings with a single choice of over or under FL230 for High Speed Cruise. It appears to me the only difference between Normal and High Speed Cruise is 2300 RPM for Normal and 2500 RPM for High with 30 IN MP for both.
The single ISA Day Speed Power Curves are more revealing. Make sure you pay attention to the notes. Now, deduct 4 knots if the 3-bladed propeller is installed, which it is, but looks so cool. Evidently the curves assume we will be flying with de-ice boots installed. The last note is that airspeed decreases approx. 1 Kt for each 10°F above ISA.
The other items to check is that the cowl flaps are closed, gear is up, flaps are up and mixture is leaned to peak TIT. All these curves are for Max Gross Weight so expect a little improvement as you burn off some fuel or are not fully loaded.
It should be interesting to check the accuracy of our computations with the TAS readout on the G600, which is a heck of a lot easier.
This brings up one of my gripes about the standard Carenado provided PDF documents. For the life of me, I fail to understand why they package this minimal data in separate PDF files.
Let’s look at the full complement of PA34 related documentation found in the Carenado folder just off the main FS directory.
| PA34 References | 3 Pages | Actually 2 pages, cover don’t count |
| PA34 Performance Tables | 3 Pages | Actually 2 small charts, could be 1 page |
| PA34 Normal Procedures | 19 Pages | Most useful document, checklist, flight profiles |
| PA34 Emergency Procedures | 21 Pages | Concerns engine failure, gear, turbo and alternator problems. Good document. |
Just once it would be nice to see all 4 documents combined as one PDF document. 46 total pages including 4 cover sheets.
Practice area – air work
Now, let's get back to actually flying the Carenado Seneca V. I am straight and level at 5,500 feet, about 3 miles from the Oregon coastline near my home airport of Selitz Bay, S45 in the Orbx PNW.
I am slow flying at 90 Kts, just a needle width above blue line. The plane handles great. I roll into a 30° bank to my left, ease my nose up and add a little power to hold airspeed and altitude. I make a double 360° and roll out on my entry heading and repeat the 720° to the right. My personal goal is not to lose or gain more than 100 feet, and hit my headings within 10° when I am rusty like this. I tighten up my criteria when instructing.
The plane flies like one would expect, nice, solid, firm feel. I bring back power to idle and ease into a clean stall, then drop the gear and add full flaps for the power off landing configuration stall. This is nice, and offers no surprises.
I clean up the plane, go back to straight and level, slow cruise, and start a climbing left turn. I keep adding backpressure for a takeoff and departure stall. It's the same thing, with mostly just the nose dropping at stall speed. Now I remember why this is such a popular twin for flight schools. In addition to being docile and easy to fly, it has great fuel economy.
A couple of figure eights and a chandelle should get me in the mood for some single engine work. I ease back the mixture on the right engine, pull back the right hand blue prop lever and am rewarded with a perfectly feathered engine. I move the left throttle to full power, to 37 IN MP and double check the Autopilot is disengaged. I want to see what the attitude looks like with one engine churning and one dead.


It is usually a good idea to disengage the autopilot when you lose an engine. While you may be busy troubleshooting, checking fuel valves and such, you could easily be headed into an unusual attitude with the autopilot attempting to maintain an altitude or impossible climb rate. Always keep a close eye on that airspeed indicator when cleaning up with a dead engine. Those colored radial lines are there for a reason.
This one is no longer docile and easy to fly. I’m thinking someone needs to revisit the parameters for single engine operation. I could not hold altitude with full power and full prop on the good engine with the other engine feathered.
I went back and did more basic stalls, with the approach to the stall at a more rapid rate just to see if I could get the mild manned Seneca V to roll over on her back. Yes, it can be done, just not with every try. Before you go out to practice your spin recovery technique remember the Seneca V is certified only in the Normal Category and spins are prohibited.
It's time to see if I have the moxie to bring this one back home on one engine. The surface winds have changed and the local traffic at S45 will be using 17 as the favored runway. The approach will be over a stand of Black Cottonwoods and the prevailing wind usually hits you with some side forces and swirling gusts as you drop down to the narrow tree-lined runway.


You will want to set up your final approach speed and profile for a long and gradual descent to the runway with only the one engine running. No sudden movements, everything should be very deliberate, smooth, and easy.
Does the Carenado Seneca V have the optional known icing package?
Although I was told this FSX/P3D model was based on a real 2004 Seneca V based in Chile, I don’t know much more than these bare facts. I would guess the owner would have air conditioning and the optional known-icing packages. The flight simulator could probably care less about these options but if we are to fly up in the flight levels, we are going to need oxygen and FIKI (flight into known icing).
It's interesting that new Piper won't sell you ice-protection equipment piecemeal. You either buy the full approved FIKI package or nothing at all. This includes pneumatic leading-edge deice boots, electric windshield and propeller heating elements, electrically heated pitot-static probes and stall warning vanes, plus an ice light for illuminating the left wing leading edge to check for ice buildups when flying at night.
The system is effective, but like any ice-protection system it is not designed to take on the worst icing conditions, or to let you mill around in ice-laden clouds for indefinite periods of time. The system is intended to give you some extra time to escape icing should it be encountered.
I can’t tell if the Carenado model has the full ice-protection package or not, but knowing it came from Piper, it is the full blown deal and we do have switches for de-ice and heated pitot and virtually all recent Seneca’s come with the di-ice package installed. There is a good case to be made for having it since we also have the optional Wing Light to check for icing.
Back to the airport for some pattern work
Here’s where the Seneca really shines. Turning final with two notches of flaps (25°) at 90 Kts provides a good visual attitude and a stabilized descent path. I usually wait until I am sure I can make the runway before selecting full flaps. A gentle flare to bleed off any extra airspeed and the Seneca touches down with ease and grace.
A quick flaps up and full power for a touch and go and we are airborne again. Full power may not really be full power, due to the waste gate limiter and turbo charger setup., due to the waste gates and turbo charger setup.
For my second approach, I stayed with the two clicks of flaps all the way to touchdown which makes for a slightly tail-low or slight nose-high attitude. The comfortable pilot’s seats along with the new lumbar adjustment and the slightly lower instrument panel affords good visibility in the approach and flare, providing just the right visual cues to ensure consistently smooth arrivals.
Finally, I fly the pattern and make a no flap landing. Other than a slightly flatter attitude and slight higher airspeed there is not much difference until you start to wonder if you are ever going to bleed off enough speed to get through the ground effect and touch down.
Some pilots say they prefer a conventional elevator to the Piper stabilator, but I bet if there was a way to switch one with the other not a single one could tell the difference in feel. Sure, the big flat stabilator looks for the life like a mini Hershey bar but it is no different than the Cessna Cardinal. Come to think of it, I believe the Cardinal stabilator may be a copy of the Cherokee.
Don’t forget to move the flaps extension switch back to the flaps full up position. The Seneca requires the flaps to be in the full up position and locked to support weight on the step when deplaning.
Takeoffs and Landings you can practice in your Seneca
One of the more useful documents found in the PA-34 Seneca V sub folder in the Carenado folder just off the main FS folder is a pdf entitled Normal Procedures. Buried near the end of the document you will find the Normal and Short Field Takeoff Checklists and the associated Normal and Short Field Landing Checklists. What seem to be missing are the Soft Field Takeoff and Landing Checklists.
Here you will find the VX and VY climb speeds, power settings and cowl flap settings for the Maximum Performance and Cruise Climbs.
Using the Garmin G600
A 10 page overview of the Carenado Garmin G600 can be found in the Documents folder. This should be required reading if you are not already familiar with the G500/G600 units. The Carenado PA-46T Malibu JetProp had the G500 panel installed so those owners will feel right at home in the new Seneca V with the G600 panels. With both of these planes being Piper products they have so much in common that they look like sisters.

The Seneca V and the Garmin G600 Panel
To get started let me show you just how easy it is to convert as early model Seneca V to the G600 panel. Check out these two screenshots. It could be that Garmin used the Seneca V as the model for their G600 upgrade panel. The G600’s visual unit is two 6.5-inch diagonal display units mounted into a single bezel. The net effect is one 6.7 in high x 10 in wide dual screen unit that replaces the ‘standard six’ flight instruments. You are still required to have 3 backup instruments – Airpseed, Atimeter and Artifical Horizon.
|
|
|
|
| |


The layout of the Carenado Seneca V edition is perfect for the required backup round gauges to be placed along the left edge of the Pilot side G600 display with the Glide Slope immediately below the left hand screen. Notice we have a right seat G600, but without the backup instruments. This leaves the round engine monitoring instrument in their original locations and easy to observe.
For those of you who will be stepping up to the G600 directly from steam gauges, you will have an easy transition due to the duplication of half the ‘sacred six gauges’ both inside the G600 display and outside the display in the near traditional display.
Carenado has included in the documentation a 10 page PDF overview of the G600. It is important that you read this document because the Carenado edition is not a true replica of the real world Garmin G600 found in the real world Seneca V. Carenado’s edition is slightly more than a Garmin G500 but less than a G600. Maybe a G500 + or G550 special edition.

The real world Garmin G600 has Synthetic Vision Technology included in all units as a standard item. This is missing in the Carenado G600.
Weather Radar is also included as a standard item in the Garmin G600 and is represented as a graphic but non-functional Radar in the Carenado edition. This basically just uses computing power with no practical benefit.
TWAS-B Terrain Awareness and Warning System is optional in the real world Garmin G600 but is represented in the Carenado G600 edition.
The MFD side of the Carenado G600 has a Navigation Page that can be selected for TWAS, Traffic Advisory, or Weather.
Garmin G600 / Carenado G600 Overview
Garmin earned FAA certification for the G600 retrofit flat-panel avionics system back in 2008, about 4 years after our real world Seneca V that served as the inspiration for our Carenado Seneca V for FSX/P3D was built. This means we must be flying a G600 retrofit Seneca V.
The G600 retrofit package comes with the single LCD, dual bezel display, a solid-state AHRS, digital air data computer, magnetometer and temp probe, as well as some installation hardware. The cost of installation varies widely from shop to shop and from airplane to airplane but is in the $30,000 and up range. We have a second display for the co-pilot or right seat.
The G600 system uses a composite display - an HSI and ADI on the left and a big MFD on the right - packaged together in a panel-mount case that replaces the instruments in the traditional six pack. Backups are installed (often using the previous primary instruments) in various locations. In our Seneca V, they are installed just to the left of the G600 Pilot’s display. Depending on the airplane, they could be on the right side, above or below the G600 display but always for the pilot side.
Because the G600's MFD is mounted directly adjacent to the PFD, you can scan changes to the MFD that you may go unnoticed when flying with the larger G1000 unit.
Unlike the G1000, which is intended for factory-new airplanes, G600 doesn't have built-in NAV/COMM/GPS but makes use of separate Garmin WAAS panel-mount navigators, such as the GNS 430 and GNS 530. Tens of thousands of airplanes already have Garmin navigators installed; owners can add them along with the G600.
Our Carenado Seneca V edition comes with dual GNS 430 units that can be upgraded to Reality XP GNS 430 units should you already own an XP 430 and the unlimited edition. Unfortunately, the timing was such that the new Flight1 GTN 650 WAAS panel navigator is not an option. More on this later in the review.
While the G600 doesn't come with an autopilot, it does integrate with a large number of the most popular general aviation autopilots, so customers are able to utilize their current AP. Roll steering (GPS-S) is available with some G600-approved autopilots. GPS-S allows the autopilot to follow a number of navigator cues, like procedure turns and DME arcs, which most conventional NAV systems can't fly.
Our Carenado Seneca V is paired with an S-Tec 55X autopilot so the G600 provides flight director functionality and altitude preselect.
There are also a number of optional features that many pilots will get. Number one on my list would be IFR charts. Garmin's ChartView is supplied as standard or the optional Jeppesen charts for additional fees.
Most pilot’s initial comments are how sharp, bright and clear the displays are and sim pilots are usually amazed at the resolution of the VC gauges. The Carenado Seneca V does not come with 2D panels, however the G600 does have the one click zoom and can be unlocked, resized and moved to a second monitor. The good news is when you zoom and move the G600 window, you retain an active unit in the VC panel. This is far superior to the black hole in most add-ons. Kudos Carenado.
As far as ease of use is concerned, the G600 is a piece of cake. If you're already familiar with the 430/530 or the G1000 system, the G600 will feel like second nature.
If you are a G1000 user there are a few things that you'll have to do a little differently, like using the GNS 430 as for the radio and GPS flight navigator.
There are a lot of things the G600 won't do that the G1000 will but what it will do is give us a nice bright flat-panel display with a near fully functional MFD and a great upgrade path to the G1000, G2000 or G3000 in future add-ons.
To bridge the time gap until Carenado gets onboard with the readily available Flight1 GTN 650 and 750 units you can use a popup window for dual GTN650 units or a large fully functional GTN 750 with onboard SafeTaxi and Chartview IFR charts with Nav/Coms and transponder built into the display. These Flight1 GTN units are available for both FSX and P3Dv2.
|
|
|


Carenado G600 3D knob
We have a niffy twist on the Tooltips with the 3D knob in the lower right of the Carenado G600. This helps with identifying the Inner and Outer knob so you know if you will be changing Pages or not. Garmin still has then dual knob as confusing as you could possible make a two-part knob. The back button is sometimes not present if the Alert in on, which is almost constant. I like the hint to ‘Press the MDF knob to return to the base page’. Now if I only could identify the MDF button and the Base Page I would be in like Flint. Holding down the CLR button does not return you to the NAV page like older Garmin units.

The PFD or Left hand side of the G600 is a near duplicate of the G1000 and all the represented functions display the same data minus the NAV/Coms. Those new to Garmin glass displays should recognize the Airspeed Tape, Altitude Tape, Vertical Speed Tape, and HSI. The upper blue area represents the sky and the lower brown color represents the ground.
There is a tremendous amount of data constantly updated and displayed on the PFD that you may have not seen before. This would be items like TAS, GS, OAT, Wind Direction and Speed, Digital Compass Headings, etc.
The NAV Status Bar across the top of the PDF has selectable Waypoint and Track data and the Airspeed Tape is loaded with useful information including the traditional ASI color bands, Reference Markings for VR, VX, VY and the Blue and Red Radial Lines for single engine operation.


Flying Approaches
About 20 miles South of S45 is KONP, with two runways and very little traffic. This makes a great airport for practicing approaches without having to fly over the mountains or burn extra fuel. I started off with the ILS 16 approach that I set up with the GTN750 just to makes sure it was talking to the G600 and to also make sure the G600 was listening to the 3rd party GTN. All is well that ends well. No problems at all. I think the G600 picked up a few new tweaks in the new SP2 update. I noticed the Altitude Tape lost the ‘thousands’ digit that we need at low altitudes. That means there will most like be a SP3 somewhere down the road. I’m hoping that support for F1GTN 650 gauges comes with the SP3.
I really like the G600 with the round gauges snuggled up close. The Seneca V flies approaches like a champ. Smooth as silk with a very solid feel. The suggested approach speed is so slow that I have been playing around with less power, more flaps, more power, less flaps just to see what it does to the flight attitude. The answer is not much. As long as you cross the fence at the right speed and altitude all is fine. Very stable airplane.

I just remembered that I haven’t heard any warning horns. I need to check that out on the next flight. You know when you retard power with the gear up and when you are sneaking up on a stall. There should be some warning horns, and there might be, I just don’t remember hearing them. Maybe that is because I am using my checklist.
I checked mine and the answer is yes and no. The stall warning horns works as expected, but there is no audible warning that your landing gear is not down and locked if you retard the throttles to full back. I’m sure it is on somebody’s request to the support team.
Does this Seneca V have a Yaw Damper?
There is an inop small turn knob just to the lower left of the backup Airspeed indicator labeled Trim on top and Yaw Dumper on the bottom. Now that is not a misspelled word in the review, it is a misspelled word on the panel. I think it may be time to create a word or term to identify these silly little mis-steps that seems to end up on the panel or glass of every Carenado model. These obviously are things that should have been caught by the beta testers, oops sorry, I forgot Carenado does not use beta testers.
How about a new term for your Webster’s – a Carenado-Oops - we may have to work on the spelling to somehow get rid of the hyphen but the new term is ‘Carenado-Oops’. My first declared CO, this is short for Carenado-Oops because we may be using it quite often, is the Yaw Dumper.
There is a misspelled word in the sentence above the Yaw Dumper, ‘PUSHING THR STDBY PWR BUTTON . . . probably should be PUSHING THE STDBY PWR BUTTON. This is not a CO it is just a simple misspelled word. See the difference?
There is something about a WINDSHIELD PANEL TREAT printed on the panel just above the Mixture levers that I don’t have a clue what is intended. Wait, I bet TREAT should be HEAT.
Maybe if we could combine Carenado and Anomaly it would be a more descriptive term - a Carenadomaly. Nah, keep thinking.
|
|
|


It seems likely that since the Yaw Damper was an option on the Seneca V, maybe this one just does not have that option. I didn’t miss it while I was doing my climbing turns. If you do have one don’t forget to turn it off should you lose an engine unless you can actually make use of it once you are trimmed out with the dead engine feathered.
Time for a Cross Country Flight in the Seneca V
So I load up 3 of my golf buddies, 4 golf bags, and little additional baggage and head south to Pebble Beach. The new KMRY Airport for Orbx Northern California is our destination for this flight. I used the default Flight Planner to pick the VOR route for me and I took the suggested altitude. I feed the same route into my GTN750, which is just about as simple, and now I can check one against the other on the way down to Monterrey.
Crap. Where is the Weight and Balance section for the Carenado Seneca V? Hello Google. No joy there. The fall back is to use the Fuel and Payload dropdown box in FSX or P3D.

OK what we do now? The gross weight is 4,750 pounds. Carenado’s Empty weight is 3,300 pounds. Leaving the Std Useful Load of 1,450 pounds. It looks like our model from Chile is light on the installed equipment by about 75 pounds. See Spec chart.
We have useable fuel of 122 gallons. 8 Quarts of oil is counted in the Empty Wt. Baggage capacity – Forward 100 pounds/15.2 Cu ft., Aft Compartment 85 pounds/17 cu ft.
For our ‘Not for Real Flight’ calculations we will assume the pilot and 3 passengers all weight in at 180 pounds each and the golf bags weigh 40 pounds each. We will assume the 4 golf bags will fit in this wide cabin that Piper is always touting and the really handy forward baggage compartment way up front near the nose gear—2 go up front, 2 aft.
First, let’s take a look at just the weight. Pilot and Pax – 720 lbs, baggage 160 lbs, Useable fuel 122 gal x 6 = 732 lbs.
Ta-da, our total weight is 1,612 pounds with 2 empty seats.
This first look has us 1,612 – 1,450 = 162 lbs overweight. The way I figure it, we can’t leave the golf clubs behind unless we leave the golfers behind and I’m going, ‘cause I’m the pilot. Let’s bring the weight in line with the Max Gross Weight of 4,750 lbs. This means we will start our calculations with 27 gallons of fuel less than full tanks. (162 lbs / 6 = ~27 gal)
New calculation. Useable fuel is now 95 gal with 47.5 gal in each tank. How far can we fly on 95 gallons of fuel at Gross Weight for takeoff? That depends on our chosen cruise altitude, wind, and temperature.
Crap, where are the fuel calculations charts for the Carenado Seneca V? I’m going to take the minimal information available in the Performance PDF for my estimate which is Normal Cruise below 20,000 feet should be 24.0 GPH. This calls for 2,300 RPM and 30 IN MP. Lean to peak. Now we are getting somewhere.
Distance is estimated to be 511 NM from S45 to KMRY flying VOR to VOR inland and almost a straight line. I am going with the recommended cruise altitude from the Flight Planner, which is 11,500 feet to be safe over the mountains provided we stay on course.
So using the detailed charts, ha, that is less than 20,000 ft so we should us 24 gal/hour for how many hours? We also need to calculate the TAS for our altitude and temperature.
Using our first Performance Chart, I come up with 174 knots for our estimated True Air Speed. We have to deduct 4 Kts for having that good-looking 3 bladed McCauley propeller, but there is almost no vibration with this new prop.
Using the second of our total of two Performance Charts, we find the Normal Cruise Power curve indicates we should burn approximately 24.0 GPH at cruise. We can use the old not-totally-correct calculation that any extra fuel used for climbing to altitude will be offset by the increased fuel economy during our descent. Maybe it is close enough for this trip.
 />
/>
The next thing we need to know is the distance from S45 to KMRY and some expected wind direction and speed. First part is 511 nautical miles according to our chosen route, which is mostly a straight line. I added a waypoint just prior to the destination to keep from getting a little too far offshore as I approach Monterrey Bay. My plan is to start out VFR and file IFR enroute if the weather deteriorates.
I plan to file IFR in any case for the transition between Travis AFB and KSFO/KOAK because there is so much high speed and airliner traffic in the area. I’m sure NorCal Center is also not interested is a light twin flying VFR and trying to dodge clouds and fast movers.
To sum up our numbers for this first practical cross country in our new Carenado Seneca V we have a distance of 511 NM, a TAS of 174 Kts, Fuel Flow at 24 GPH, and our chosen Altitude is 11,500 for the entire trip. We will assume that we do not fight a headwind all the way and that the temperature will be close to normal at this lower altitude.
The altitude is also a good choice because I also didn’t want my golf buddies to have to wear an Oxygen mask. I have a hard enough time understanding those turkeys when they are talking to me without having masks on their faces.
|
|
|
|
| |


We will be at Gross Weight for the takeoff roll with about 75% fuel onboard. We can legally have an extra 4 gallons of fuel onboard if we expect a long taxi or wait time for takeoff. The rw max ramp weight is 4,773 pounds for the Seneca V according to the official Spec Sheet.
I ran the built in CG calculation with the two rear passengers in different seats and it doesn’t seem to matter so they can choose to look at each other or both take the rear seats and look forward. I have two sets of golf clubs in the forward hold and two in the rear baggage area so they should ride good and help balance the CG.
I come up with almost exactly 3 hours of flight time with the simple calculation of 511 NM / 174 Kts = 3 Hours flight time. We could add a few minutes for climb time and deduct a few minutes for the letdown for approach to landing. I’ll say 3 hours 5 minutes Hobbs Time.
We have 122 gal of fuel available but chose to carry 27 gal less to stay within the Max Takeoff Gross Weight. This is 122 – 27 = 95 gallons useable fuel 95 gal - (24 gph x 3 hrs = 72 gal) = 23 gal remaining at destination. That would be sufficient for VFR or IFR flying.
We can plan on stopping at KSJC, San Jose or a neighboring airport along our path for refueling if the calculations are not correct. Should we have favoring winds or less than estimated fuel consumption we can elect to continue without a fuel stop. We are expecting good golfing weather for the next few days.

Because we don’t have any detailed climb charts I will record our climb speeds, rates and time. The suggested cruise climb speed is 110 knots so I will hold that speed with a couple of extra inches of Manifold Pressure for the climb. I have noticed in the few hours that I have in this Seneca V that the Mixture settings makes a lot of difference so I will be tweaking the TIT lean numbers as we climb.
I was just thinking that the mixture settings might be impacting the single-engine climb performance. After our golf weekend, I will go back to my practice area and do some checks to see if I can improve the performance with one engine out. That fancy new engine monitor should suggest the peak power settings. We shall see.
The surface winds were mox-nix and S45 didn’t have any reported traffic when we were loaded and ready to go so I chose to use the south runway because that is the direction we are headed. As we are climbing straight out from Runway 17 to the ONP VOR 18 miles away I am keeping a close eye on the airspeed to hold 110 knots and watching the VSI that is generally hanging around 800 FPM.
As we pass our first checkpoint we record ONP at 8,200 feet in 12 minutes. That is 18 nm so we averaged a little better than 650 FPM fully loaded. We reached our climb altitude of 11,500 feet 11 miles later so I clicked on the GTN750 map and created a user waypoint for TOC so we could come back and check the route on another flight to build our own performance charts.
So for now, we can have a climb rule-of-thumb of 30 miles in 30 minutes at 110 knots airspeed for up to 12,000 feet. The climb rate will surely drop off as we go higher. That means it will take a very long time to get to the altitudes that will support 200+ knot airspeeds in the Seneca.
|
|
|


I captured a screenshot of the instruments as we got settled down for our first leg of the flight to see how close our Seneca is preforming to our estimates. I guess you could say they were smack dab on target. Just after our TOC about 15 nm Southeast of ONP we’re recording 178 Kts TAS and 23.9 GPH at 75% power. You can’t get much closer to book estimates than that.
I love it, a slightly higher airspeed and slightly better fuel consumption and for a bonus we have a tailwind component with 198 Kts ground speed.
An engine monitor is a very useful addition to any cockpit and this one is no exception. I do have a personal problem in that I can’t read any of the little bitty red numbers from my normal flying position. My temporary fix is to create a popup window for the engine monitor gauge—that way I can enlarge the display to numbers and see the performance from outside the cockpit. The downside is I can’t adjust anything without going back to the VC and zooming in nor can I cycle the view from power settings to fuel settings, etc.
But this is great for fine-tuning your power levels. I settled on just a hair under the 1650 max peak TIT with 29.3 IN Manifold Pressure and 2,400 rpm for my 75% power settings. This returned 178 Kts TAS and 23.9 GPH at -8 deg C and 11,500 feet.
The ground speed dropped off as we slowly changed our heading and the Cold Front was blowing in. We picked up a puffy cloud layer right at our altitude so I filed IFR and asked for 11,000 feet so my estimates would remain valid.

We arrived at KMRY non-stop with all three factors in our favor. We stayed very close to our estimated TAS, had a slightly favoring wind, and had slightly less fuel consumption than expected at cruise. Our route covered a tad more than 500 nm and we got to see some great views of Northern California.
Using our Carenado Seneca Engine Monitor readings we could keep a close check on the remaining fuel in each tank and cross check that with our drop down FS Fuel and Payload feature. At shutdown at KMRY we had 31 gal remaining in the tanks. That computes to a fuel efficiency of 7.98 nm per gallon, which is outstanding.
I used the GTN750s Fuel Planning utility, which does a great job of keeping up with all the math. One click on P.POS and update the FOB, FF, and GS and you are looking at all the fuel, efficiency, endurance and reserve at destination.
Cruising at 11,500 feet with power set to 75% and leaned to peak we were seeing 22.7 gal/hour fuel burn at times. Of course a higher cruising altitude should improve those numbers. Our speed dropped about 10 knots or so for the last 200 miles of our trip.

Startup to shut down time was within a couple of minutes of 3 hours and we covered 511 nm so, point to point, our speed was 170 knots and our fuel consumption was 21.3 GPH. This is nothing outstanding for speed but nothing to sneeze at either.
So, on average, all the estimates were confirmed to be accurate. Nice flight. Now if I could just break 90 at Pebble Beach.
I use Two Widescreen Monitors
Only the left monitor is active for the P3Dv2 flight sim. I usually keep the right screen filled with undocked 2d windows so I can fly outside the airplane. I use a Saitek X-52 Throttle and Flightstick and Saitek Combat Flight Pedals. I also have a VolAir Flight Sim for FSX with another computer. Here is a sampling of screenshots taken during the Seneca V flight to Monterrey.
|
|
|


Some features of using the F1GTN650/750 in the Seneca V
The new Flight1 GTN units are available for both FSX and P3D and are at the absolute top of my list for add ons for anything that you may fly in either sim. I know that Carenado is looking and testing these units so let’s hope we start to see them showing up as 3rd party avionics in the next few Carenado airplanes.
This is not a review of the GTNs but I would like to show you a few of the neat things you can do other than what you would expect from a top of the line GPS/Nav unit. Remember Nav/Com and Transponders are built into each unit and the larger GTN750 has full charts for the USA/Canada. Both have SafeTaxi charts.
You can build, edit, store flight plans in the blink of an eye and do a myriad of flight log calculations and what-ifs in the background. Here are some screen captures taken during the Seneca V flight to Pebble Beach.


STP – Same Two Pilots
It is a real shame that Carenado doesn’t take the time to come up with a few new pilots. The same two guys fly every model that Carenado makes in additions to moonlighting over at Alabeo for their entire fleet. These poor guys are flying all over the world, day and night, no change of clothes, no sunglasses, no golf shirts. These are dreadful conditions for pilots. One minute one is a crop duster at Alabeo, the next minute he is in the left seat of a King Air or maybe the little Phenom jet. Crazy.
Wouldn’t it be great if Carenado and Alabeo came up with say 5 or 6 pilots that we could choose to load or not load and use as flight crew or passengers. Maybe a female, an old bald headed grandpa, some representative pilots from around the world and let the forum readers choose the finalists. Good idea Ray. Please pass this suggestion along to Carenado if you agree.
Night Lighting in the Seneca V
Sometimes I wonder how some of the panel arrangements ever get to market. Case is point is the interior lighting and dimming controls in the Piper Seneca. If you look long enough you will find 3 rotary knobs hidden behind the pilot’s yoke. The left one functions as a one click switch, the middle seems to light up the individual switch backlighting and I’m not sure about the Avionics knob on the right, mine seems to be DOA. And this is the newest well thought out panel arrangement from the New Piper company.
Somewhere deep in the G600 Aux Pages you will find a brightness control for the panels. There is an Auto/Manual function that you may want to set on Manual. The brightness is set toward the bright side as the default so should you have a few hours of darkness you will want to lower them down to nightlight levels. As you explore some of the secondary pages you will find several adjustments. You can express your preferences on these displays, to some degree.


Recent Gripes at the Forums
I am probably as non-political as most any active flight simmer and I look forward to the next new add-on as much as anyone, maybe more so if it is high performance, has two engines or is jet powered. As part of my Review Writing duties I am exposed to a few more new introductions than the average flight simmer that only buys those recommended by the forums or reviews or after a couple of SP1 or SP2 updates or patches.
During the research and testing period for this review, usually about 3 months for me, there has been a sharp increase in what I will refer to as Developer Bashing. This can be caused by almost any reason, or maybe no reason at all, but usually it centers on bugs in the add-on, especially if the bugs are not corrected almost immediately or if they tend to be repeats from previous models. Then as more posters jump in the bashings intensify and then the thread starts to deteriorate. Since it is usually monitored it might be threatened for closure or lockdown.
Most of these complaints start as minor complaints, such as misspelled words on placards or windows, switches that either don’t work or work backwards, or misplaced or sometimes missing click spots for the ADF or Transponder. It could be the fuel valves or cowl flaps handles are backwards or the audio panel doesn’t work or a light switch was overlooked. All things that sound simple enough to correct in short order, especially when the models are so closely related or at least similar with similar avionics or gauges in recent models.
Many of us immediately look to one or two specialists that have the knack for fixing anything to do with sound, xml coding, or other disciplines. These are not Developer employees but ordinary gifted flight simmers that just step up and run with the ball. We also tend to purchase add-ons for our new add-ons. This might be a complete replacement sound package from SkySong or AreZone for instance and or maybe improved or advanced avionics upgrades.
We have had an SP1 and SP2 and I am expecting an SP3 for this particular Seneca V. The first two corrected many glitches or bugs, but also may have created a few new ones. Like the Altitude tape that was correct in SP1 but screwed up by SP2.
Many of the posters says that they are at wits end and are going to vote with their pocket book and not buy another Carenado model until some of these basic things are fixed. Others think Carenado should use more Beta testers to catch the early bugs and to do this prior to the first release to the public. And, yet others think Carenado does not spend enough time building and testing the models using the logic that they are coming at us so fast, they couldn’t possibly have the time to code and test them correctly.
No doubt there is some truth in every one of these comments
One thing that practically everyone agrees on is that the exterior and the interior modeling is drop dead gorgeous for anything that Carenado produces. Another given is that it will indeed have some really dumb things that don’t look or work correctly, like missing or misplaced click spots, transponder operation, words misspelled, and maybe a switch or valve that does work or works backwards.
Another one that is near the top of the list is that someone will buy the Carenado model the minute it is available for purchase. This may be because of the choice of models that Carenado has chosen to produce or maybe has to do with the purchase price or it could simply been that not everyone has such high expectations for these models.
One value added item is that all the newer Carenado models come with installers for FSX and P3Dv2 at no extra cost. This has to be worth something when compared to the other prime developers that market a separate model for each sim with the installer being most of the difference in the two but yet we are required to purchase both versions if we want to use both sims.
When I sum it all up, it is frustrating to say the least, but, when I back off and look at the really big picture, I see tremendous value for these Carenado add-ons. Most can be installed and flying in either or both of our flight simulators almost instantly. Sure, none have been perfect but they all do fly and they are all spitting images of the real McCoy and look just like the ones in the marketing brochure from Cessna or Beech or Piper or whomever. Further, there will be some corrections and updates, either by Carenado or by our own support members and the product will be improved.
I will probably be criticized by some for adding this section into the review of an airplane, but to me it is important that we stay civil when we criticize the developers. Not that we shouldn’t speak our minds and say our peace, but at the end of the day, most of us want to go flying and enjoy our chosen hobby. And for those of you that are at their wits end, I see nothing wrong with voting with the pocket book. I basically do something similar by buying many of my add ons only during the Christmas and Black Friday sales.
The Sound Package for the Seneca V
Of all the complaints that I read on our forums, the engine sounds seem to be the single item that practically everyone agrees was not only not well done but bordered on sub-standard for this day and age of digital sounds and editing programs. I admit, the first time I added power for the takeoff roll, I thought something was wrong with the engine sounds. A quick switch to the exterior view and the sounds were more in line with what I remembered the Seneca sounds to be.
I quickly did a typical FSX maneuver and added a one line change in the ‘Sound file’ to Alias the sounds for the Carenado Cessna 337H. Sure the engines are not exactly the same but I had an add-on sound package for the Skymaster that instantly improved the new Seneca V engine sounds for me.
Others were suggesting the SkySong Seneca II/V sound package fixed the problem. Yet others recommended the AreZone Seneca V sound package. Even these add-on sound packages were being tweaked by our Sound Specialists to rid a blip or glitch or bump.
I must admit that I don’t hear very well, but I do know what I like to hear for simulator engine sounds and I also know what I don’t want to hear. Dueling Chainsaws or buzzing type engine sounds are on my ‘ungood list’ and that is what the original Carenado Seneca V engine sounds suggested to me.
Skysong Soundworks Piper Seneca II/V HD Audio Pack FSX
FSPilotShop.com has both the Skysong HS Audio Pack and the Carenado Seneca V for immediate download. My order for the HD Audio pack was purchased, downloaded, installed and working in a matter of minutes. Should you elect to upgrade your sounds, make sure you backup your originals prior to pressing the install button.


This replacement sound package may not be on everyone’s list, but it was high on mine because I think the sounds are almost as important as any other single item in the big scheme of things.
You can find a YouTube video to hear the sound effects of all these add-on products and can hear before you buy to make sure it is what you are seeking. See the links at the end of this review.
I think pleasing sounds are one of the most difficult things to achieve for flight simulator add-ons. I guess it’s akin to sitting in a Starbucks and watching the customers add the cream and sugar to their coffee. If you only have cream and sugar it seems to work fine, if they offer the pink sweetener, the blue stuff, the yellow stuff, brown sugar, white sugar, warm milk, low-fat milk, half-n-half, warm cream, chilled cream and a few other things then you can bet someone will have try everyone and then others will ask for even more choices.
There’s nothing wrong with having choices, but after about 3 hours of listening to different sound packs for the Seneca V I decided that I liked a little of each one but was not totally happy with any one package. I went back and listened to the original Carenado sounds and I agree they are poor at best. I have no idea what was changed for SP1 but there are improvements but that sound pack still needs a little more work.
I tested a few of the sounds that were available in my virtual hangar using the super simple ‘Alias=Airplane name\sound’ one liner in the sound.cfg file and I could reload and have my Cessna 337 Skymaster sounds, my Just Flight Seneca sounds, my Carenado Baron B58 sounds, my Carenado Seneca V SP1 sounds, and my new SkySong Soundworks HD Audio pack sounds.
This is what generates that ‘Starbucks Syndrome’ of having so many choices. I liked the flap and gear sounds from one, the takeoff roll and power reduction sounds from another, the interior cockpit sounds from yet another and the full power climb from yet another one – maybe - I’m not sure anymore. This is about when I got confused and couldn’t remember which one I was listening to. Then I got the backup folders mixed up and totally lost control of the sounds. I had to reinstall the SP1, then reinstall the Skysong Soundworks and limit my choices to the two.
The two areas that make or break it for me are the ones that I will listen to the most. This is the takeoff roll, power reductions and cruise, both inside and outside the airplane. All the others sounds I can usually live with, but given the choice, I will always go for the throaty, deep rumble type sounds over the buzzing and chain saw type sounds and I like to hear the flaps moving and a clunk when the landing gear is seated and locked up or down.
It is also a positive step toward realism to hear proper click sounds for switches and buttons and such while performing your normal pilot duties, not just the engine sounds and door slams.
As you may guess, the Skysong Soundworks was the winner. Any purchased sound package will cost about 1/3 of the price of the airplane so look for recommendations and listen to the demos and youTube videos prior to selecting one as your choice. There are also some good free sounds packs from FS9 that work just fine in FSX and P3D.
The FDE or Flight Dynamics Engine – How Does it Fly?
My personal assessment is this: this one is as good as we have seen lately. The Seneca V has the Master’s Touch, ie, Bernt Stolle.
That is usually the end of any conversation when it comes to how well it handles, or flies, or feel. All these things are very subjective and depend a lot on your hardware and FS setup.
I like the touch and feel of the Seneca V and I like the layout of the G600 panels fitted next to enough round gauges to make it interesting. The external shape and design goes all the way back to the early 1970s and not much has changed over all those years.
The new smoothing of the cowlings and reshaping of the air holes from the 1993 makeover added some seriously good looks and several additional knots of cruise speed. But that big old Hershey Bar wing has only received the smallest of reshaping and tapering over the years and the Stabilator looks like it did on day one or maybe the Lance II days.
The addition of the automatic waste gate valves and the intercoolers make the turbocharger almost a background issue except when you are still putting out the same power level at FL180 as you were at sea level. Now that is really nice.
The digital Engine Monitor is a great new addition, if I could only read the text. Let’s all hope for a 2D popup for Christmas.
I think the modern paint schemes and the updated panel and avionics are the big change and the Carenado liveries look just like the real ones in the sales brochures. I found that I could change the registration numbers if I didn’t get carried away.
The Seneca II set the stage for this one and all the changes since have been to keep it updated and modernized to keep it competitive in the marketplace. The latest one has three very large G1000 panels and not much else in the panel. But, for your friends and neighbors looking up as you fly over your house, they don’t have a clue what is inside of your new plane.
A Few things that I Really Like about the Carenado Seneca V
I like the dual G600 panels, one for each seat, and I especially like the fact that you can ‘popup’ and enlarge one, undock the window, resize it and move it to a second monitor, and still have both panels installed and operating. Most add ons have a large black hole in the panel when you Popup a panel.
I like the Reality XP support to change out the Carenado supplied GNS430 with the Reality XP but, I don’t understand why it is only for Nav1 and not both Nav1 and Nav2 and why both are not popups?
I like having the built-in working Engine Monitor for throttle, prop and fuel management but I hate that I can’t read the tiny little red numbers or the text or the center selection knob position. This goes almost to the top of my ‘Most Wanted’ improvement for SP3 for the Seneca V.
Recommendation to Carenado - Make the Engine Monitor a Popup so we can enlarge it and move it to a second monitor. This will enable adjustments from outside the cockpit and eliminate having to zoom in to read the display while making adjustments.
I like the fact that Flight1 supports easy installations of the GTN650 and GTN750 Navigation Units in all add-ons. The popups work great but there are a few add-ons that just scream ‘put me in the VC panel’ and also let me popup. The Carenado Seneca V is one of those screamers. Replacing the two standard GNS430 units with two smoking new GTN650 units should be in your face simple to do, but it has to be done by Carenado. I am pretty sure they are working on this, just no promises.
The big one is to do some reshuffling and rearranging and some not so simple stuff in the center of the panel of the Seneca V to accommodate the big daddy GTN750 unit. You see you really do need both a 750 and a 650 to do it right. This would give you a new Audio Panel, Nav1/Com1 and a new built-in transponder and full electronic maps and approach plates for the US/Canada and the second GTN unit will have your Nav2/Com2, a backup transponder, SafeTaxi charts and most of the other features of the 750, just not the full charts. Both units have the SafeTaxi, which is great stuff.
When Flight1 gets the Crossfill working and available for the two units it will be even better.
Now, I have it on good authority that Carenado is looking at making provisions for these GTN units, provided you already own them as separate purchases from Flight1, in some future Carenado models. The kicker is whether or not Carenado will go the extra mile and make accommodations for some of their older, but still very popular models. The most pressing question is will Carenado make the necessary changes to the Seneca V panel so we can add the GTN units to this one. This is my number one item on the Most Wanted for the Seneca V list.
But not far behind this most wanted item is to have updated VC panels for the older but still wonderful Carenado models in my virtual hangar and also some of the newest ones. I guess my personal priority list for adding F1 GTNs to the Carenado VC panels would start with the new Pilatus PC-12 – this is another one of those ‘screamers’ closely follow by a large group that I fly often. Let’s see, there is the F33A Bonanza, the Cessna 337H Skymaster, the B58 Beech Baron, the A36 Bonanza. Well, I guess you get the picture but it seems to me that once Carenado figures it out, the updates could be adapted to the other Piper products with similar panels, like the JetProp and Mirage or similar Beech and Cessna models.
I like the visual effects that work with the sound effects and animations when starting the engines – the burping and coughing and smoke is so real I can almost smell the startup. I like to see the airplane squat down when you add payload or fuel. I like to see it bounce around a little in the weather and a bunch of others that I can’t remember right now. I did notice the animated sparks when my high performance takeoff resulted in a tail strike. Nice.
You can over gross 300 pounds and it takes longer to get off the runway just as it should. Of course it flies sluggishly as it should. Very nice, Bernt.
I also like the visual effects and the handling of the aircraft when I imitate a student pilot learning to land a twin in a crosswind and skipping and bouncing down the runway, add too much power, floating, then touching down on one wheel then the other, then slamming on the brakes as you run out of runway and watching the oleo strut bottom out. Very well done.
I especially like the solid, heavy feel on the flight surfaces on a stabilized approach. The Seneca V wants to make a perfect approach every time in all weather, it is us pilots that tend to screw it up.
I tend to forget to compliment Carenado on all the background touches that add up to a very enjoyable airplane. These are those window scratches, instrument reflections, needle movements, animations and such and all those big and little things that make their planes look so realistic. Those rivets, fasteners, dirt, stains, shadows, reflections, bumps, shines and other things that total up to a great add-on. Thanks Carenado.
My Few Dislikes
- That it is not a little faster and pressurized, but then it wouldn’t be a Seneca would it? Is that now called a Matrix or a Mirage?
- That the Carenado Seneca V wasn’t the flag carrier for the new Flight1 GTN 650/750 panel mods for the VC. Still holding out hope for a SPx to fix this.
- My age old disappointment with the sparse and near non-existent detailed flight planning documentation – more speeds and charts, please. Especially some overview and instructions for the Digital Engine Monitor Panel.
- I’m am so tired of the same two pilots in every Carenado/Alabeo flight model, we need some new faces. Do you know how unrealistic this makes your so realistic planes look?
Conclusion
There probably are still a page full of small niggles that could be addressed or fixed in the Carenado Seneca V but as it sits today in my virtual hangar I enjoy flying it. I enjoy having some competition for my Carenado Beech Baron 58.
I think it is unrealistic to expect each and every little item to be absolutely perfect in these mid-level add ons. Sure it would be nice if some of them were in the next SP, like the 2D Engine Monitor popup, or the number one or two item on someone else’s list but while we are waiting we can be enjoying some healthy competition for our Carenado Baron B58 and Cessna 337H Skymaster or maybe the Cessna 340.
The one item that would move the Carenado Seneca V to the top choice for my light twin flying would be to have my Flight1 GTN units mounted in the VC similar to the approach Carenado has taken with the now unsupported Reality XP units. I am not suggesting the Reality XPs Panel Mods be discontinued, just give us an additional choice with the F1GTN units.
Just How Good is this Carenado Seneca V?
In a word, I think it is excellent. Every bit as good or better than the C337H Skymaster or the Beech Baron B58 and this one comes with turbo-normalized intercooled engines with a digital monitoring panel for precise settings and dual Garmin G600 panels.
If I limited my view and my votes to strictly the airplane this Seneca V would be flying the Avsim Gold Star flag tomorrow, absolutely no doubt in my mind. However, when I look at the bare thin amount of documentation - no cockpit or panel layout charts, no detailed takeoff and landing, climb, cruise and descent charts for various altitudes, no overview or instructions for the Digital Engine Monitor Panel to explain the usage, operation and features the whole package falls short of the criteria for our highest award.
Even if I could convince myself that I could eventually dig all this information out from similar add ons or break down and purchase a real world Pilot’s Operating Handbook, POH, from one of the online stores, ebay or Piper I couldn’t overlook the disappointing sound package, the misspelled words, placards, inop switches or lights, wayward click spots, etc.
Final Thoughts
I went back to my practice area a couple of miles out over the ocean and worked on the single engine climb problem I was experiencing. I tweaked the TIT to peak, lean of peak, tried full power, slightly reduced power, and anything that I thought would help the plane climb with one engine out. Nothing worked for me. I failed to get any sustained climb, not even 50 FPM. I don’t think this is correct, but it is not high on my priority list of items to fix and it should not hinder anyone’s decision to buy or not to buy.
I did not go through the Seneca V specifically looking for dead switches or things that worked backwards and such. If I noticed something that didn’t work, didn’t work correctly, or I didn’t understand how to use it as part of my normal flying then I mentioned it. There are plenty of users out there adding to the ‘Gripes List’ in the Avsim Carenado forums. I do hope the Carenado Support Team drops by from time to time to see what the customers are discussing in public.
At Pebble Beach all those golfers were looking up and pointing at us and wishing they were up there flying in the Seneca V along the 17 mile Drive and here we were looking down at them and wishing we were down there with a putt for birdie on the golf links. It never changes.
Bonus Screenshots
|
|
|
|
|
|
|
|
|
|
|
|
|
|
|
|
|
|
|
|
|
|
|
|
|
|
|
|
|
|
|
|
|
|
|
|
|
| |


Test System
Intel i7 2700 OC to 4.5 GHz
8GB RAM
Dual Dell WS Monitors, 27 IN and 24 IN
nVidia GTX580 1.5 GB
Crucial M4 256 GB SSD
Intel 330 180 GB SSD
Windows 7 x64
Prepar3D v2.3
Saitek x52 Controller, Combat Flight Pedals, Bose Companion 20 Speakers
Publisher: Carenado
Download: 277MB + SP1 and SP2
Platform: FSX/P3Dv2
Format: Download
Credits
Thanks to Dolf for his great custom screenshots – see Bonus Screenshots
Thanks to Flying Magazine 2008 for the G600 description.
Thanks to AOPA Magazine for several interesting articles about Senecas in general.
Thanks to Bert Pieke for assistance and bug fixes.
Thanks to Carenado for building and providing the Seneca V for review. www.carenado.com
Thanks to Flight1 for making the new GTN series so much fun.
Thanks to Shoreline Aviation for the turbo text.
Thanks to gpestel, aka Gérard Pestel for allowing me to post the link to his video.
Thanks to FSPilotShop for providing the Skysong Soundworks Seneca HD Audio Pack
Skysong Soundworks Seneca demo
FSPilotShop sells both the Carenado Seneca V and Skysong Soundworks Seneca HD Audio Pack
Demo of add on sounds for Seneca V


Recommended Comments
There are no comments to display.
Create an account or sign in to comment
You need to be a member in order to leave a comment
Create an account
Sign up for a new account in our community. It's easy!
Register a new accountSign in
Already have an account? Sign in here.
Sign In Now